
Pearl tufting foot TEXI 1054
Code: TEXI 1054


Product detailed description
The pearl sewing foot is designed for sewing on beads and pearls up to 4 mm in diameter. A bead guide is also included.
Instructions for use:
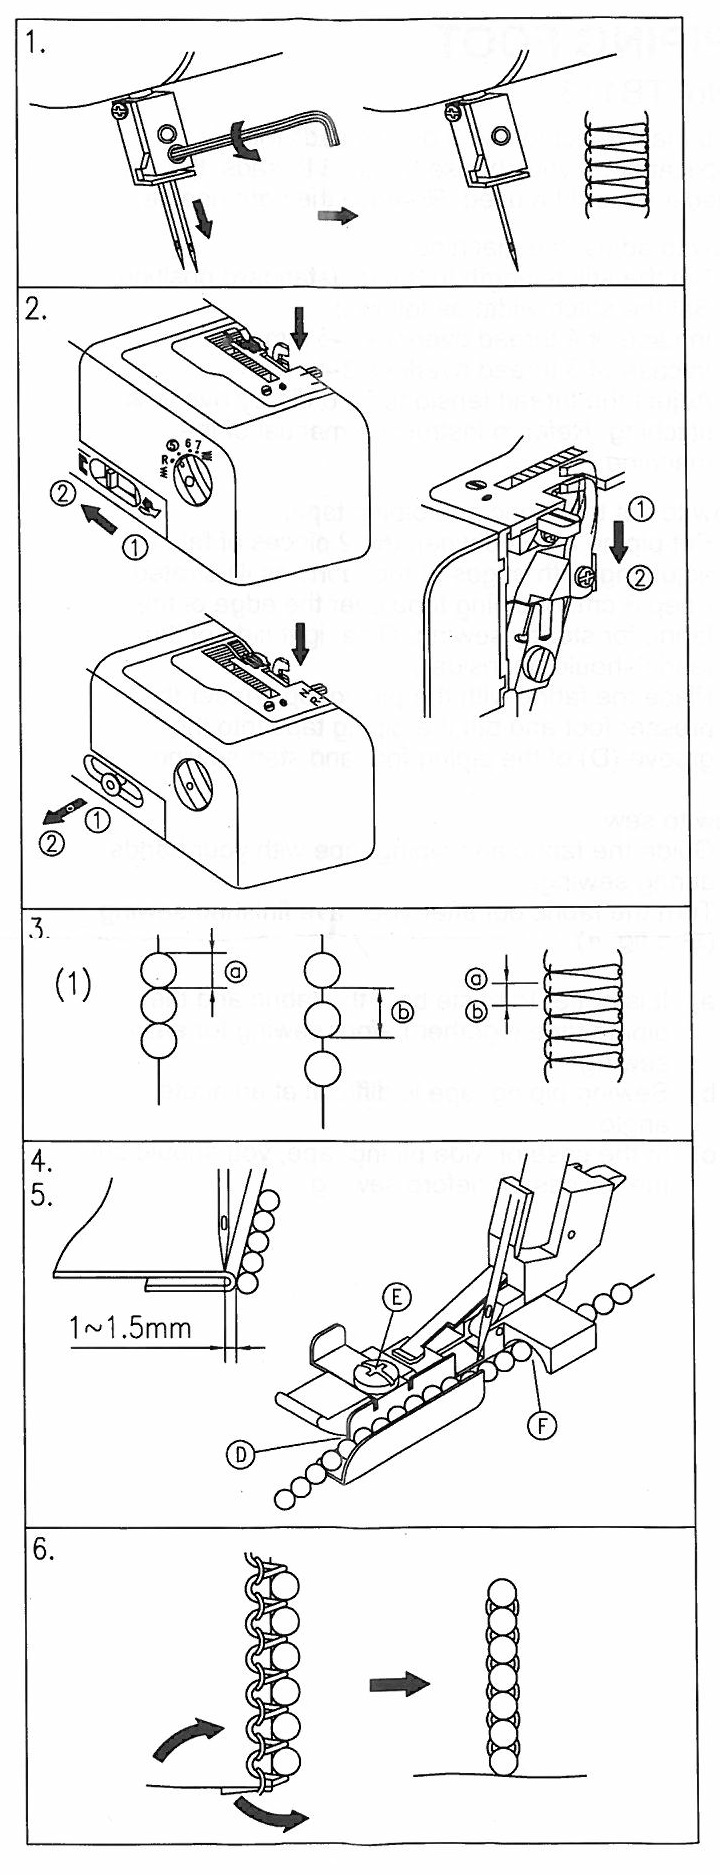
1. Move the upper knife lever back to release the knife and remove the right needle.
2. Replace the basic foot with the bead sewing foot
3. Set the stitch length as shown in Fig. 3 e.g. 4mm stitch spacing a-b in the picture
Set the stitch width to 3-5mm
Reduce the thread tension slightly.
4. How to prepare the fabric:
a) fold the fabric in the place where you want the beads Fig. 4.
b) the needle must be at the edge of the folded fabric
c) loosen the screw E to adjust the distance between the beads and the fabric (fig. 5.)
5. How to place the beads:
Place the beads in the guide on the right side of the foot and slide them under the tunnel at the back of the foot (F)
a) At the beginning of sewing, gently guide your hand until the beads completely pass through the tunnel.
b) lower the machine slowly so that you guide the fabric and the beads at the same time
c) leave loose threads at the beginning and end of the beads so that you can sew them in
For small beads, use a right needle.
Additional parameters
| Category: | Texi presser feet |
|---|---|
| Warranty: | 24 months |
Discussion
Be the first who will post an article to this item!